For over a year now I have wanted to play around with Silverlight, but for some reason or another I always put it off. In my experience this usually means that the thing I keep putting off is not a priority. But with all the hype around Silverlight 4, I thought it would be a good time to learn XAML and all the other cool stuff included in the Silverlight 3 runtime.
And like every new technology, to actually learn it I need to build something with it. And like everyone playing with Silverlight these days, my first coding experience would be writing a simple twitter client. I started with this application in mind because it could run 100% out of browser and I thought that would be a very cool application to play with.
To get started you will need to download Visual Studio 2008 SP1 along with the Silverlight plug-in. To get the project templates and the ability to write an application in studio you should also download the Silverlight toolkit.
Once you get all of the above installed, open visual studio and select new project. You will notice a new addition to your list 'Silverlight' - click this and select the Silverlight Application template. Next studio will ask you if you want to host this inside a new web project because by default you need to have your Silverlight application in the browser (to start anyway).
So to start building the client, let's first look at how the networking stack works in Silverlight 3. We can create a normal http GET or POST but with anything twitter related you will need the ability to pass along your credentials. And as I found out, this was the big missing feature of the networking stack included with the 3.0 release. So unless you want to hack up some hybrid silverlight/javascript solution you will need to wait until Silverlight 4 is released to build a 100% stand-alone client that can pass along network credentials via Silverlight.
Instead of passing the credentials inside Silverlight we will ask the web application we are hosted in to do that work for us. The first reason is that we don't have the ability to do this inside Silverlight anyway, but the second is that we can avoid the cross domain call if Silverlight uses the same web application its hosted in to pass the xml or json around.
The code below is a very simple http request to ask the twitter API for my user timeline. Notice you can use both http and https with this call.
1
2
3
4
5
6
7
8
9
10
11
12
13
14
        public string GetTimeline()
        {
            HttpWebRequest request = (HttpWebRequest)WebRequest.Create('https://twitter.com/statuses/friends_timeline.xml');
            request.Method = 'GET';

            Byte[] authbytes = System.Text.UTF8Encoding.UTF8.GetBytes('username:password');
            request.Headers['Authorization'] = 'Basic ' + Convert.ToBase64String(authbytes);

            HttpWebResponse response = (HttpWebResponse)request.GetResponse();

            string JSONString = ProcessStatusesAndReturnJSON(response.GetResponseStream());

            return JSONString;
        }
You will notice we are getting XML back and need to parse this if we want to do something useful. In this simple example we only really need the username and the status update. In the below code we parse the returned XML to get these values and turn them into JSON so we can pass them to our Silverlight client.
1
2
3
4
5
6
7
8
9
10
11
12
13
14
15
16
        private string ProcessStatusesAndReturnJSON(Stream str)
        {
            List<TwitterStatus> TwitterData = new List<TwitterStatus>();
            XmlDocument doc = new XmlDocument();
            doc.Load(str);
            XmlNodeList statuses = doc.SelectNodes('/statuses/status');

            foreach (XmlNode n in statuses)
            {
                TwitterData.Add(new TwitterStatus { Text = n.SelectSingleNode('text').InnerText, User = n.SelectSingleNode('user/screen_name').InnerText });
            }

            string JSONString = JSONHelper<List<TwitterStatus>>.ConvertObjectToJsonString(TwitterData);

            return JSONString;
        }
Now the new and exciting code for our silverlight client is shown below. So when the application first gets moving we want to request the timeline using again a very simple http GET request. But if you are new to Silverlight you will notice a convention that is required when working with this new platform. To avoid blocking the UI thread everything must be done async (and this is a good thing).
1
2
3
4
5
6
7
        public void RequestTimelineFromTwitterAPI()
        {
            HttpWebRequest request = (HttpWebRequest)WebRequestCreator.ClientHttp.Create(new System.Uri('http://localhost:49170/Home/GetTimeline'));
            request.Method = 'GET';

            request.BeginGetResponse(new AsyncCallback(TimelineRequestCompleted), request);
        }
So when we return from the web client we need to parse the JSON and do some very simple data binding work.
1
2
3
4
5
6
7
8
9
10
11
12
13
14
15
16
17
        public void TimelineRequestCompleted(IAsyncResult ar)
        {
            HttpWebRequest request = (HttpWebRequest)ar.AsyncState;

            HttpWebResponse response = (HttpWebResponse)request.EndGetResponse(ar);

            string TwitterJSON;

            using (StreamReader reader = new StreamReader(response.GetResponseStream()))
            {
                TwitterJSON = reader.ReadToEnd();
            }

            List<TwitterStatus> StatusCollection = JSONHelper<List<TwitterStatus>>.ConvertJsonStringToObject(TwitterJSON);

            this.Dispatcher.BeginInvoke(() => CallInvokeStuff(StatusCollection));
        }
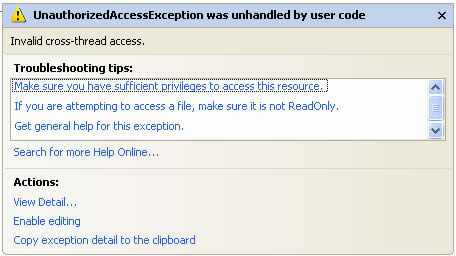
In the above you will notice that I actually don't do any data binding directly because when I tried I got this error message about 'UnauthorizedAccessException'
So to work around this issue, I simply delegated this work to another method.
1
2
3
4
5
6
        private object CallInvokeStuff(List<TwitterStatus> StatusCollection)
        {
            Tweeple.ItemsSource = StatusCollection;

            return null;
        }
And finally in the XAML we are binding this collection to the ListBox control.
1
2
3
4
5
6
7
8
9
10
11
12
13
14
15
16
17
18
19
			<ListBox x:Name='Tweeple' Background='White' Height='500'
                 Width='600' BorderBrush='Black' BorderThickness='1'
                 FontFamily='Arial' Margin='0,0,0,0' VerticalAlignment='Top'>
                <ListBox.ItemTemplate>
                    <DataTemplate>
                        <Grid Width='500'>
                            <Grid.ColumnDefinitions>
                                <ColumnDefinition Width='.30*' />
                                <ColumnDefinition Width='.70*' />
                            </Grid.ColumnDefinitions>
                            <Grid.RowDefinitions>
                                <RowDefinition Height='50' />
                            </Grid.RowDefinitions>
                            <TextBlock Grid.Column='0' Text='{Binding Path=User}' FontSize='15' />
                            <TextBlock Grid.Column='1' Text='{Binding Path=Text}' FontSize='15' TextWrapping='Wrap' />
                        </Grid>
                    </DataTemplate>
                </ListBox.ItemTemplate>
            </ListBox>
The sample that is available for download allows the end user to do a status update via http POST but to keep this short I won't go into detail here. But it's the same basic idea, async request to the web application and on the complete we verify everything worked.
I'm playing around with the beta of Silverlight 4 to get a working example that doesn't require a web application to do the GET and POST work. I'll try to get this up when I have a working example.
