For some reason it took me several tries to get this SQL plugin working with eclipse and MySQL so I decided it would be a good idea to throw the steps online for anyone else who might run into the same problems I did.
Download the MySQL jdbc jar
First pull down the jdbc driver for MySQL so we can connect to your local database. Google for 'mysql jdbc driver jar file' but the url I found here works just fine.
Pull down the latest tar.gz file and once the download is complete extract the jar using tar xvzf download.tar.gz (we will use this file later).
Install Eclipse
Open the synaptic package manager
sudo synaptic
type eclipse in the quick search
Choose the top package and mark for installation. Just to be clear I'm talking about the one with the description 'Extensible Tool Platform and java IDE'. Click apply and finish the installation.
Install Sql Explorer plugin
Open the eclipse IDE and click the help menu. You should see an option toward the bottom that says 'Install new software', click this.
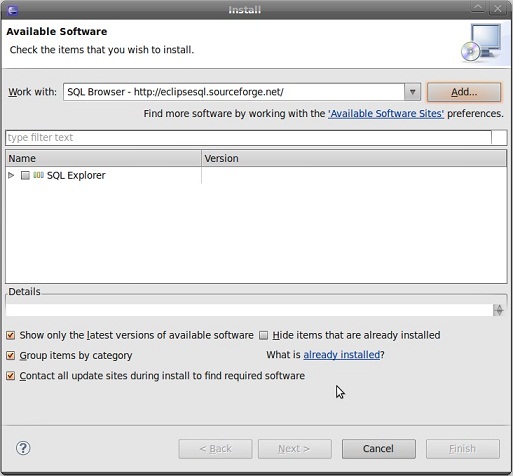
In the dialog that opens put the following url and provide a name of 'Sql Browser' then click next
http://eclipsesql.sourceforge.net/
You should see a check box next to 'SQL Explorer'. Check this box and click next
select this and install the plugin by clicking next/next/accept the terms and finish. If you get a security warning about unsigned content just click ok. After these changes eclipse will ask to apply the changes and finally to restart.
Configure the plugin
after eclipse opens back up click the 'open perspective' button found just above the 'outline' panel on the ride side of the IDE. Select the 'other' option and you should get another dialog box with an option for 'SQL Explorer'. Select it and click ok
Next create new connection profile by clicking the 'create new connection profile' button on the left panel. Give it a name and provide the url below to connect to the local instance of MySQL
jdbc:mysql://localhost/
Next click add/edit drivers. Once you are inside the next dialog navigate the tree on the left to view the jdbc drivers' After you see a list of these drivers populated you should see an 'Add' button on the right side, click it.
Give it a name that you will remember and for the url use the same one we put in earlier
jdbc:mysql://localhost/
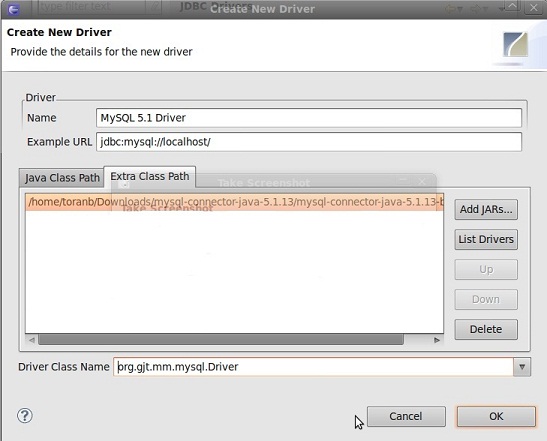
Next click the extra class path tab. Inside this tab click the add jars button and navigate to the extracted mysql jar file. Select it and click ok.
After the above is complete, click the 'list drivers' button. At the bottom of this dialog you should see a select box labeled 'driver class name' - select the following and click ok.
org.gjt.mm.mysql.Driver
If you did everything correctly the 'create new driver' dialog should look something like the below. If so click ok to close this dialog and ok again to close the initial dialog that came up.
Now you should be back in the 'create new connection profile' dialog. Select the driver you just created from the 'driver' drop down list
Finally enter a user named 'root' and click ok. If you followed the steps above correctly you should have a connection profile that looks like the below.

when this is done it should create a new connection for you so right click it and select 'connect'
The strange behavior in SQL Explorer is that the login will come up and you will need to remove the user 'root' (so it should have no user and no password) - then click ok and it should connect to your new mysql database. In a perfect world you should need to clear this but I'm yet to find out why this occurs in the plugin.
If you connected successfully you can open a new query window and start writing sql!
